Continuous testing and deployment of a serverless app with Travis and Docker
Development of all apps in Keboola requires automated testing and deployment. So when we decided to create a portal for third-party…
Development of all apps in Keboola requires automated testing and deployment. So when we decided to create a portal for third-party developers as our first serverless app running on AWS Lambda with the amazing help of Serverless framework, we had to find out a way of its automation too.
Travis CI is a hosted build automation tool that can be setup to automatically run tests after each commit to your GitHub repository. Its capabilities are wide and we usually add automatic deployment after creating a release. Travis can also run a Docker image which is suitable when you want to have as good as possible control upon the environment.
So as a first step we create a setup instructions for Travis.
sudo: true
language: bash
services:
— docker
before_script:
— docker -v
— docker-compose -v
— docker-compose build
script:
— docker-compose run lint
— docker-compose run test-unit
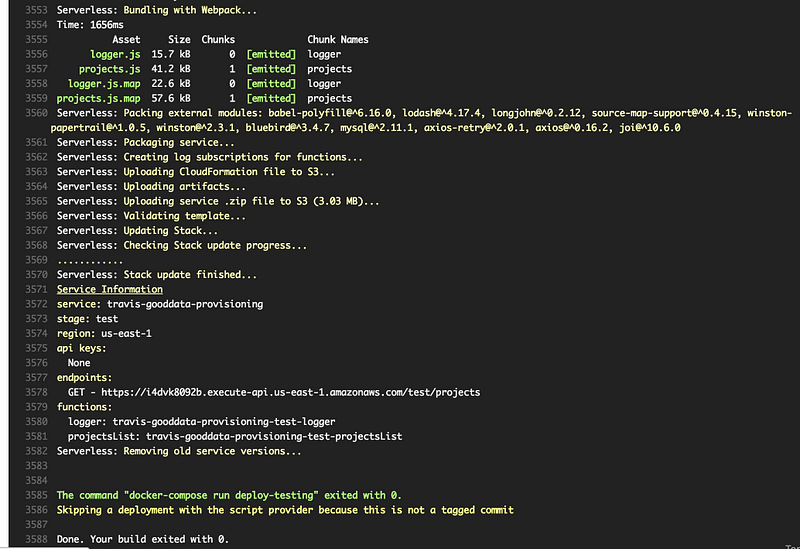
— docker-compose run deploy-testing
- docker-compose run test-functional
deploy:
provider: script
script: docker -v &&
docker-compose -v &&
docker-compose build &&
docker-compose run deploy-production
on:
tags: trueThe before_script section shows us version of Docker and Compose and builds the images. The scripts section runs image with ESLint, then local unit tests, deploys the serverless app to a testing environment and finally runs functional tests against it. The deploy section is triggered automatically when we publish a new release (or more precisely when we create a new tag) in our GitHub repository and deploys the app to a production.
Let's look at Docker definition.
FROM amazonlinux

# node + yarn
RUN yum -y groupinstall 'Development Tools'
RUN curl --silent --location https://rpm.nodesource.com/setup_6.x | bash -
RUN curl --silent https://dl.yarnpkg.com/rpm/yarn.repo > /etc/yum.repos.d/yarn.repo
RUN yum -y install nodejs npm yarn python27

# serverless
RUN npm install -g serverless@1.17

# working directory
ADD ./ /code
WORKDIR /code

RUN yarn install
We use some npm package which compiles from source code so we need the Docker image to be as close to the Lambda environment as possible, therefore we inherit from amazonlinux. Then we install Node and Yarn and Serverless framework afterward. And finally, we add the source code to the image and install npm dependencies using Yarn.
Simplified Docker Compose definition follows:
version: "2"
services:
  deploy-testing:
    build:
      context: .
      dockerfile: Dockerfile
    environment:
      - "AWS_ACCESS_KEY_ID=${TEST_AWS_ACCESS_KEY_ID}"
      - "AWS_SECRET_ACCESS_KEY=${TEST_AWS_SECRET_ACCESS_KEY}"
      - "REGION=${TEST_REGION}"
    command: >
             sh -c '
             serverless deploy
             '
  deploy-production:
    build:
      context: .
      dockerfile: Dockerfile
    environment:
      - "AWS_ACCESS_KEY_ID=${DEPLOY_AWS_ACCESS_KEY_ID}"
      - "AWS_SECRET_ACCESS_KEY=${DEPLOY_AWS_SECRET_ACCESS_KEY}"
      - "REGION=${DEPLOY_REGION}"
    command: >
             sh -c '
             serverless deploy
             '
  lint:
    build:
      context: .
      dockerfile: Dockerfile
    command: >
             sh -c '
             ./node_modules/.bin/eslint .
             '
test-unit:
    build:
      context: .
      dockerfile: Dockerfile
    command: >
             sh -c '
             ./node_modules/.bin/mocha --timeout 0 --compilers js:babel-core/register tests/lib tests/app
             '
test-functional:
    build:
      context: .
      dockerfile: Dockerfile
    command: >
             sh -c '
             ./node_modules/.bin/mocha --timeout 0 --compilers js:babel-core/register tests/functional
             '
What the Compose definitions do should be more or less obvious. We need to pass a different set of environment variables for testing and a different set for production. So we define each required variable in Travis twice, once with prefix TEST_ and once with prefix DEPLOY_.
When everything is set up, we get a nice deployment log in Travis: