Automating Self Hosted Pipelines — Part 1
Building an Azure Devops pipeline to build an Azure Devops pipeline.

Automating Self-Hosted Pipelines — Part 1
As part of our movement away from Travis CI to Azure Pipelines, I came across a repository which needs to run docker commands with swap limiting capabilities. It is included in our application which runs docker containers and is in fact an important feature enabling the application developer to specify some of the container limits. When testing, we’re also testing the memory limiting some docker containers, which understandably does not really work on Microsoft-Hosted Azure Pipelines agents. It does not allow such low level operations:
Your kernel does not support swap limit capabilities or the cgroup is not mounted. Memory limited without swap.This is a two-part article. First, I’ll describe how to automate the worker virtual machine setup using a Bash script. In the next part, I’ll describe how to automate the worker setup even further using Azure Pipelines.
Self- vs Microsoft-hosted Agent
As I didn’t want to skip the pesky tests, I decided to run them using a self-hosted Azure pipeline agent since it allows a great degree of customization. Setting up the self-hosted agent proved to be fairly straightforward and I kept using it for some months. There are a couple of differences between the self-hosted and Microsoft-hosted agent. First and foremost, the self-hosted agent is somewhat stateful. I run all of our tests inside containers so that makes this both an advantage and disadvantage. The advantage is speed — using a stateful machine means that the base image layers are cached. So when using a pipeline like this:
stages:
  - stage: build_test
    jobs:
      - job: build
        steps:
          - script: >
              docker-compose build
              docker-compose run --rm tests

  - stage: deploy_test
    jobs:
      - job: deploy
        steps:
          - task: Docker@2
            inputs:
              command: buildAndPush
              containerRegistry: $(acr_registry_pes)
              dockerfile: '$(Build.SourcesDirectory)/Dockerfile'
              repository: $(acr_repository)
              tags: |
                $(productionTag)
                $(buildTag)
The buildAndPush command is almost instantaneous. While the docker-compose command builds a couple of images, the buildAndPush command just makes sure that the right image has the right tag.
At the same time, the statefulness can bite even with containerized tests. I basically ended up running the following commands before every tests:
docker-compose down
docker-compose build --pull
docker-compose pull
This ensures that any dependent images and containers are up to date. Yet I may still run into issues with, e.g., starting two MySQL servers in two containers and both listening on the same port.
Apart from that, there are also management and cost differences. For the self-hosted pipelines, I have to pay for the running machine instead of only the consumed runtime. I approached this by putting more AZ pipelines (I have over 30 of them now) to the self-hosted agent pool so that it has some basic usage. The pipelines using self-hosted agents obviously also offer a smaller degree of parallelism. Then there is a huge disadvantage (in my opinion) to self-hosted pipelines — I have to take care of them.
To conclude — both types of agents have their advantages and both make sense in given circumstances. What is super cool is that I can combine both in a single pipeline, because the pool option can be specified on the job level. That means I can take the best from both worlds. I can run a single job of a pipeline on my machine with “obscure” settings and take advantage of higher parallelism using the Microsoft-hosted pipeline.
- stage: Tests
    dependsOn: beforeTests
    jobs:
      - job: baseTests
        displayName: 'Base Tests'
        steps:
          - script: |
              docker-compose run tests ./vendor/bin/phpunit
                               --testsuite base-tests
     - job: containerTests
        displayName: 'Container Tests'
        pool: # Run on self-hosted worker
          name: 'Default'
        steps:
          - script: |
              docker-compose run host-tests ./vendor/bin/phpunit
                               --testsuite container-tests
In the above azure-pipelines.yml snippet, the baseTests job is run using the Microsoft-hosted agent, the containerTests job is run using the self-hosted agent, and both run in parallel.
Setting up a self-hosted agent
In my case, the main motivation for using the self-hosted agent is largely in the customization. To set up the agent, I basically just follow the instructions:
- Have a virtual machine ready;
- Do whatever setup is needed (in my case, install docker & allow swap capabilities);
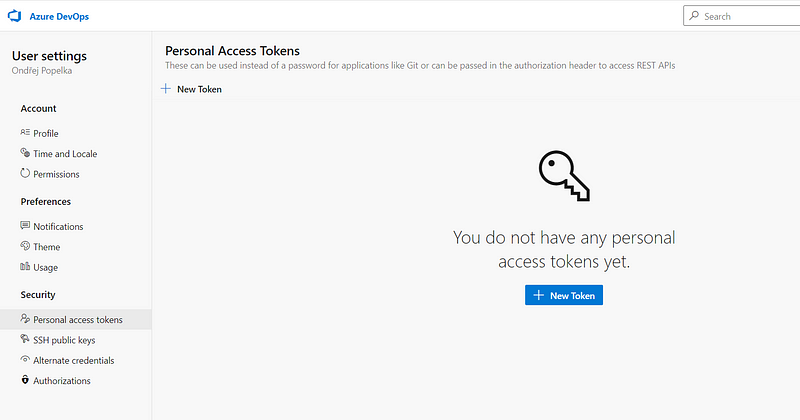
- Generate a PAT (Personal Access Token);
- Download and install the agent;
- Set the pipeline to use the self-hosted agent pool.
Done. The worker is running and there is no need to touch it.
Except that I realized that its disk fills up. The images we are building are fairly large, there are at least a dozen of them needed. So, the Standard D2s v3 with VM with a 30GB drive fills pretty quickly. So, from time to time, I have to login via the Serial console and do docker system prune --force --volumes. And then of course, do apt-get update -y & apt-get upgrade -y. Also, don’t forget to update the agent, which is done in the UI:

Oh, screw that, can’t I just get rid of that worker and run a new one? (Oh my, that’s so insensitive to the workers’ feelings, no pension, just the silicon heaven).
Automation
Running a new worker manually isn’t too bad — it’s like 20 minutes of work in the best case scenario. But it’s ~30 steps and if I miss one, it’s another 10 minutes delay. That’s a good candidate for some automation.
VM Setup
The first step is to prepare an ARM template to create a virtual machine. That’s pretty straightforward, click a machine through the UI, export the template, clean up all the parameters I don’t need, improve the naming of the resources and add tagging, remove unused parameters, add variables for resource names…
Next time, I’ll do it from scratch.
As a little f*up, I removed the public IP, but without it the VM can’t access the internet (or you have to set the Load Balancer). This is in the end quite logical, but didn’t really occur to me.
Anyway.
The second step is to attach a data disk. This is surprisingly difficult (or I’m missing something obvious) as shown by the sample script referenced in the tutorial.
Not being a bash guru, I don’t really like using huge bash scripts I don’t understand. In general, I try to avoid bash scripts completely — so I wrote one for this myself (masochism?). Turned out that I could simplify this. In the beginning, I even started with a hardcoded disk as sdc, which worked reasonably well and failed only twice in 10 attempts :) But it’s not the correct way, since the disk names are not deterministic. An article which I stumbled upon gave me the idea to use LUN (Logical Unit Number) to identify the disk.
So, I assigned LUN=10 to the datadisk in the ARM template:
"dataDisks": [
    {
        "lun": 10,
        "name": "[variables('dataDiskName')]",
        "createOption": "Attach",
        "caching": "ReadOnly",
        "managedDisk": {
            "storageAccountType": "StandardSSD_LRS",
            "id": "[resourceId('Microsoft.Compute/disks/', variables('dataDiskName'))]"
        },
        "diskSizeGB": 256
    }
],
And then ended up with the following script piece:
# pick up the disk identified by LUN specified in the template
disk_record=$(lsblk -o HCTL,NAME | grep ":10")
disk_name=$(printf "%s" "$disk_record" |
        gawk 'match($0, /([a-z]+)/, a) {print a[1]}')

sudo parted "/dev/$disk_name"
        --script mklabel gpt mkpart xfspart xfs 0% 100%
part_name=$(printf '%s1' "$disk_name")
sudo mkfs.xfs -f "/dev/$part_name"
sudo partprobe "/dev/$part_name"

block_record=$(sudo blkid | grep "xfs")
uuid=$(printf "%s" "$block_record" |
        gawk 'match($0, /UUID="([a-zA-Z0-9\-]*)"/, a) {print a[1]}')
printf "UUID=%s /datadrive xfs defaults,nofail 0 2\n" "$uuid" |
        sudo tee -a /etc/fstab
sudo mkdir /datadrive
sudo mount /datadrive
The script finds the disk_name of a disk with LUN 10, partitions (part_name), formats the partition, finds the UUID of the partition and adds it to fstab so that it’s mounted. It also mounts it manually so that the rest of the setup can continue without restarting the VM.
The next step is to install Docker Engine and Docker Compose. This is pretty straightforward — just follow the steps in the docs for Docker Engine and Docker Compose. The only change is that I wanted docker to use the data drive. This is easily done by the following setting (sudo tee is just to append to a protected file):
printf "{\"data-root\": \"/datadrive/docker\"}" |
        sudo tee -a /etc/docker/daemon.json
Now Docker has plenty of space.
The next step is enabling swap capabilities, again fairly straightforward according to the docs:
printf "\nGRUB_CMDLINE_LINUX=\"cgroup_enable=memory swapaccount=1\"\n" |
       sudo tee -a /etc/default/grub
sudo update-grub
Adding this single line to the GRUB config is one of the main reasons I’m doing all this :).

Agent Setup
Having the VM ready, I need to install and enable the Azure Pipelines agent so that it can be used to run pipeline jobs. This again is fairly straightforward following the guide. A little problem is that it has to be run under a non-root user and it needs a PAT (Personal Access Token). The Personal access token can be created in the user settings:

The agent setup requires two environment variables — worker name (as it would appear in the Azure pipelines agent pool) and the above created PAT token with manage permissions on the pool so that it can be used to register the pipeline agent. I got a little problem running runuser and passing the environment values around, so I created a little wrap.sh as needed and didn’t really bother to find out (did I mention that I really try to avoid bash?).
cd /home/testadmin
curl -s https://vstsagentpackage.azureedge.net/agent/2.183.1/vsts-agent-linux-x64-2.183.1.tar.gz -o agent.tar.gz
mkdir azagent && cd azagent
tar zxvf ./../agent.tar.gz > /dev/null
sudo chown testadmin /home/testadmin/azagent/
printf "/home/testadmin/azagent/config.sh
    --replace --acceptTeeEula --unattended
    --url https://dev.azure.com/keboola-dev/
    --auth pat --token $PAT_TOKEN --pool default
    --agent $WORKER_NAME --work /datadrive/_work" >
    /home/testadmin/azagent/wrap.sh
sudo chmod a+x /home/testadmin/azagent/wrap.sh
runuser -l testadmin -c '/home/testadmin/azagent/wrap.sh'
Then I need to make sure that the agent uses the designated datadrive and starts automatically:
sudo mkdir /datadrive/_work
sudo chown testadmin /datadrive/_work
sudo /home/testadmin/azagent/svc.sh install
All done. Now I have to restart the machine so that the GRUB changes take effect. Also, it’s good to check that I haven’t messed anything up, the disk is auto-mounted and the agent starts automatically.
Finally, I ended up with a nice bash script (final version available on Github) that takes two environment variables: a token and a worker name and sets up the pipeline worker. Quite ok, although I still don’t like bash. In the next part, I’ll show how I made this a one-click operation in the Azure Pipelines UI.


